Here's a quick-start guide to help you get your first registration up and running.
Summary
Registration is one of the most used tools in Connect Space it's important for you understand how to get it up and running. This article will cover the following topics:
- Price Tiers
- Custom Questions
- Promotional Codes
- Customize the style of your registration
- Opening Registration
How to Create Price Tiers
Price Tiers enable you to accept payment for your event (they can also be free!). Its most common use is for accepting registrations for different attendee types, but by no means is it limited to this, however, for the sake of this article we're going to focus on using Price Tiers to accept attendee registrations.
To add a Price Tier:
1. Click Registrations in the side navigation of your event.
2. Click the Actions button then click Price Tiers in the dropdown menu.
3. On the Price Tiers page, click the Add Price Tier button.
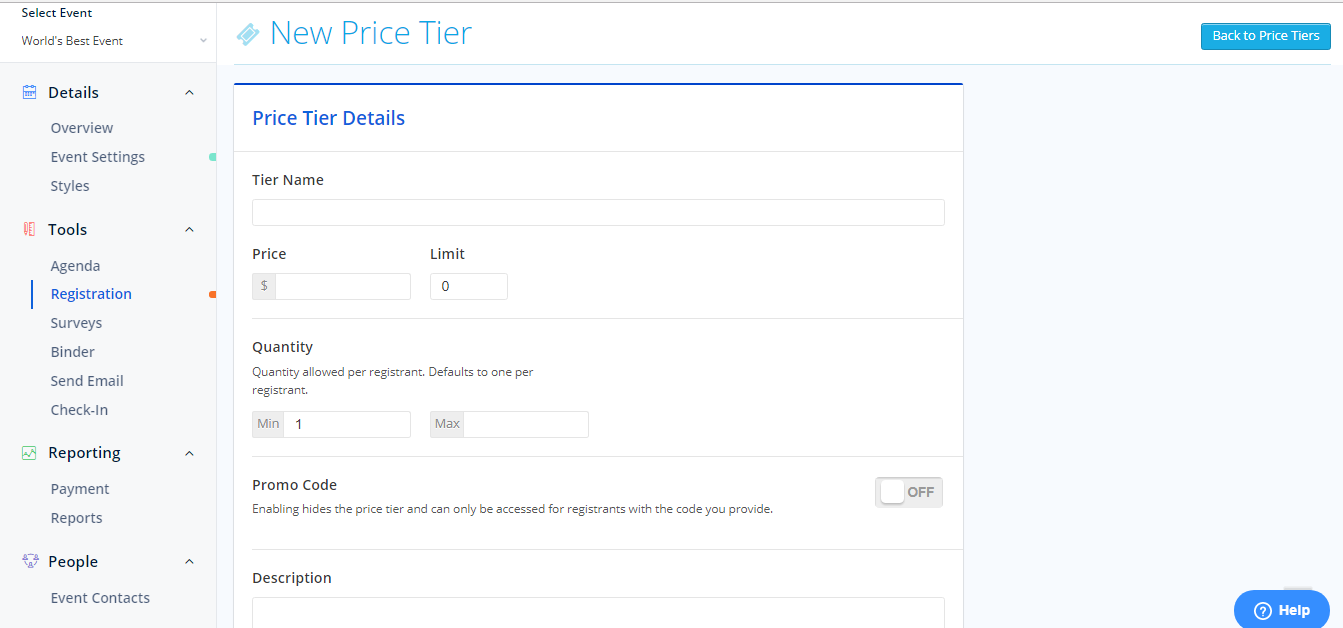
4. Fill out the information in the Price Tier Details section.

Tier Name: How the Price Tier will be displayed on the event site. For example, "Early Bird" or "General Admission".
Limit: Enables you to restrict how many times the Price Tier can be used.
Quantity: Putting a number in the Max input will allow registrants to select more than one of the price tier. However this has other side effects, so for most Price Tiers this will be left blank, see How to Use Quantities for more information.
Promo Code: This hides the price tier so that it's only accessible by entering a Promotional Code. Learn more about its uses in How to Create Hidden Price Tiers .
Description: Give your registrants more information.
Note: If you have breakout sessions, make sure to choose which days of the event the breakout sessions apply to by selecting "Days Included" under Options.
5. Click Submit
Adding Custom Questions
Use Custom Questions to collect any information you need besides the attendee's basic contact information (first name, last name, company, and phone number are collected in Connect Space's default fields. You can edit these in Registration Settings)
To create a Custom Question:
1. Click Registration in the Side Navigation.
2. Click the Custom Questions button.
3. Click the Add Question button.
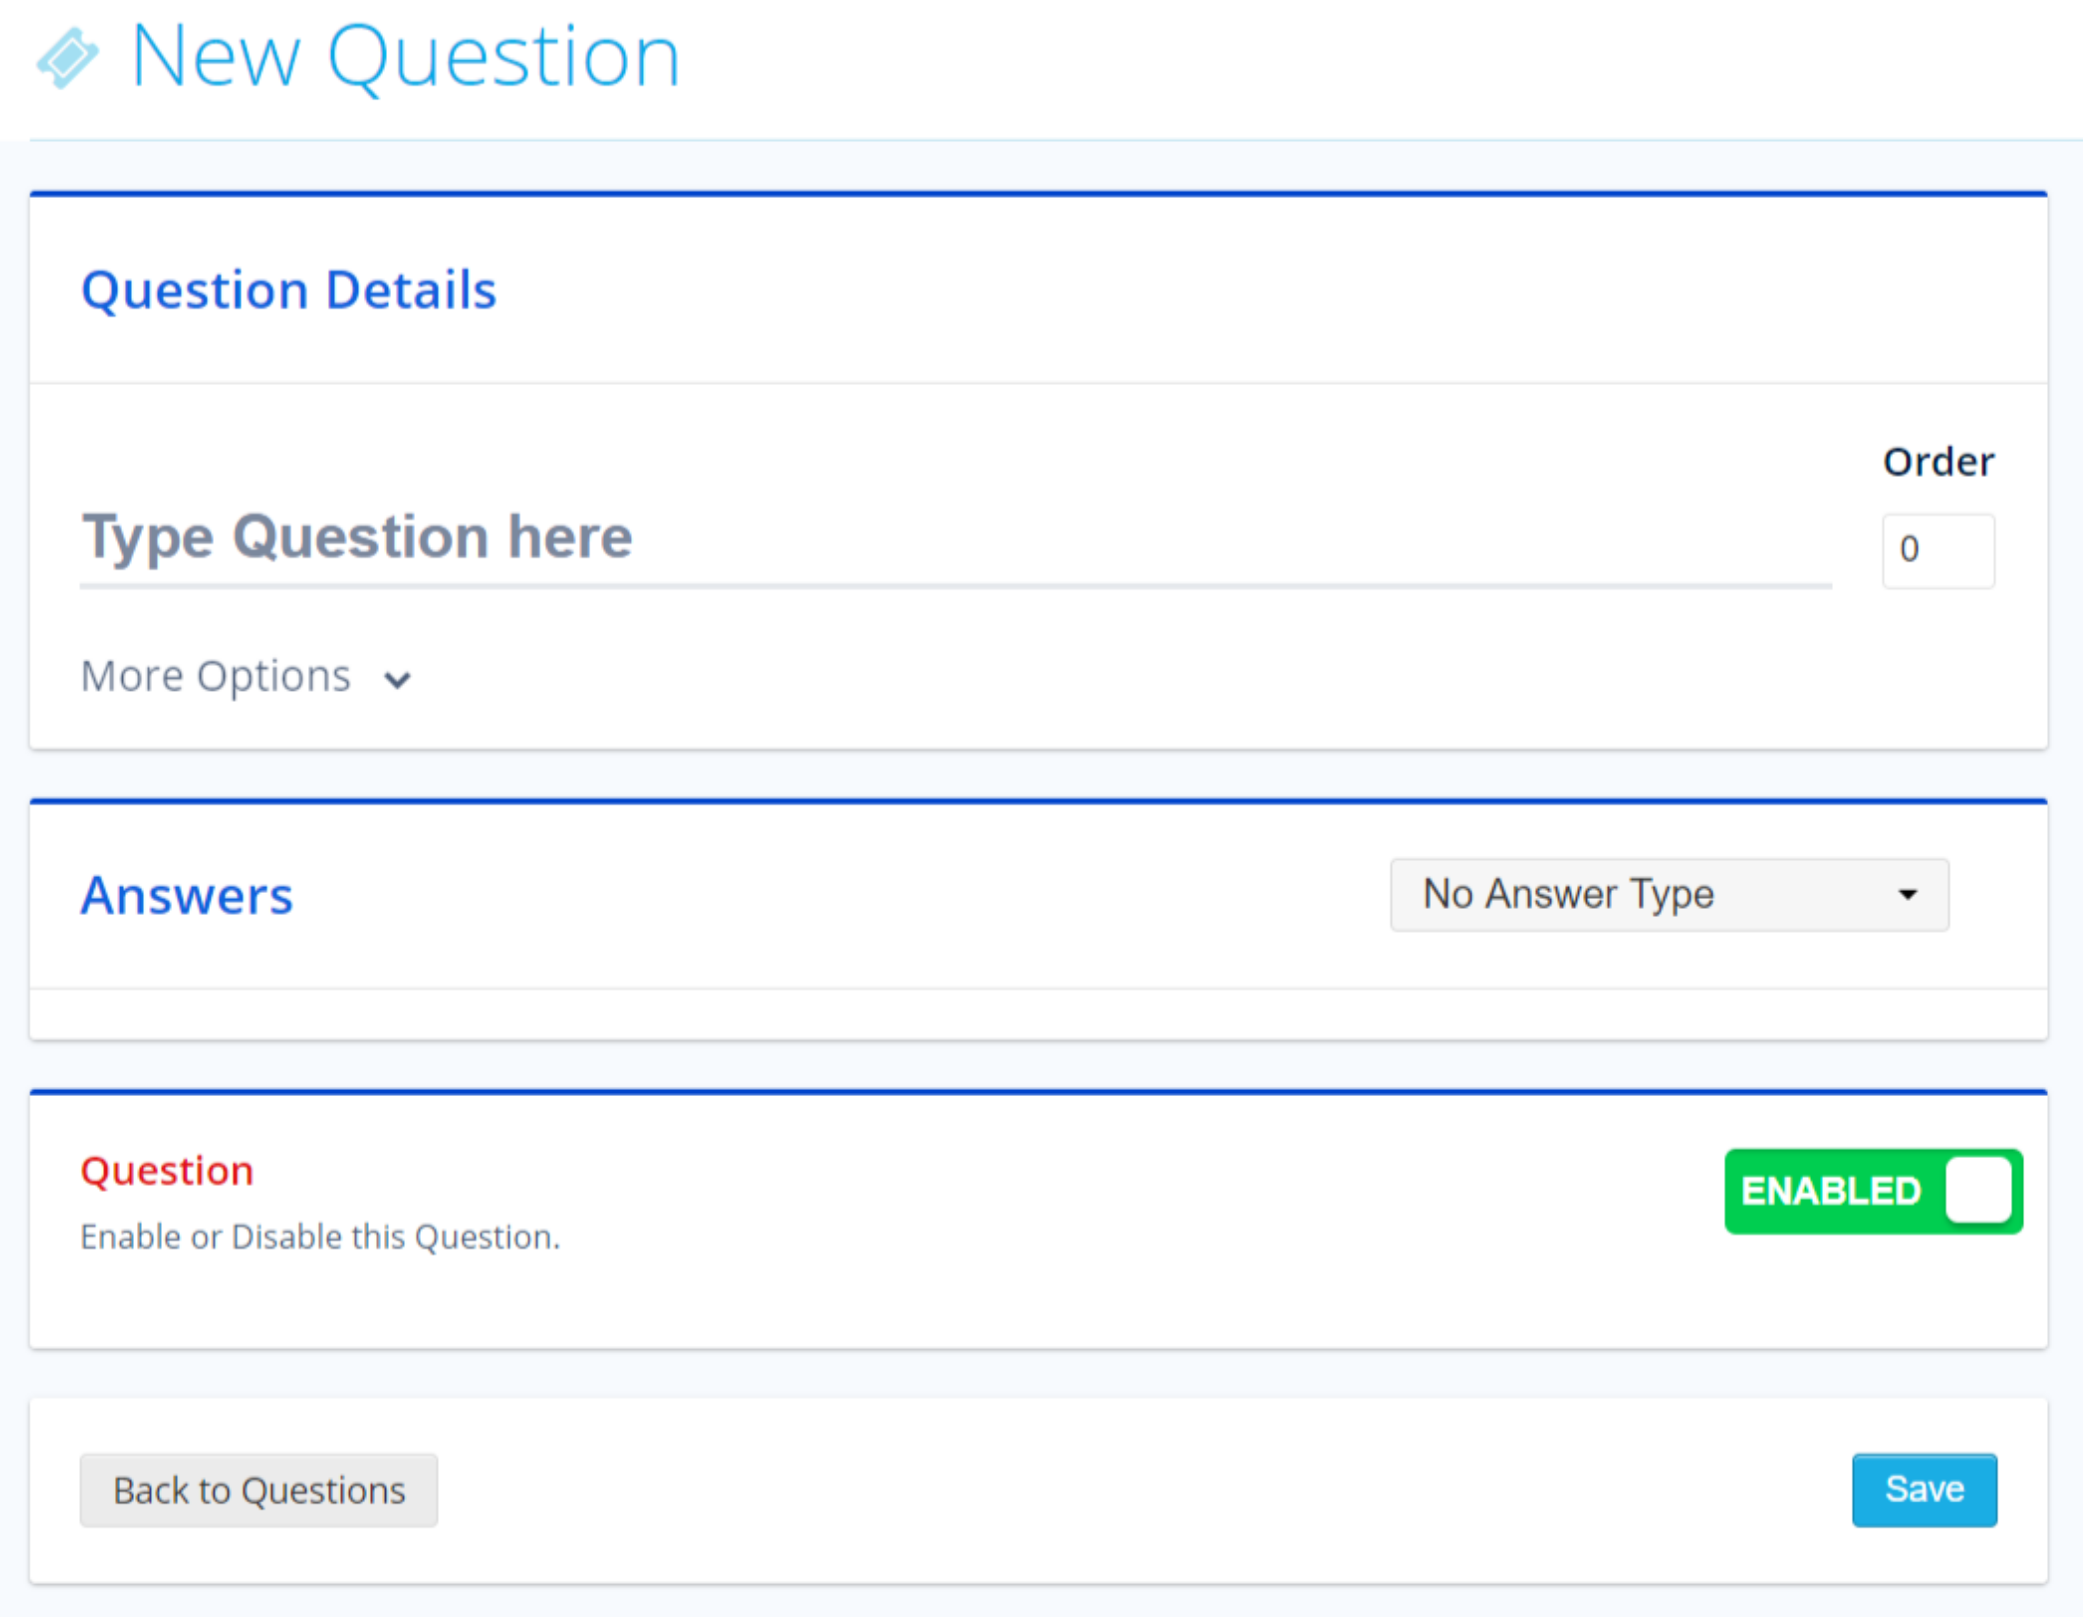
4. Enter your question in the Question field, and click More Options to customize the question further.

Short Help Info: Help text that displays under your question's answers.
More Info: A larger, expandable help text section.
Options: Choose different display options for your question, including whether or not it's required.
5. Click the dropdown in the Answers section to choose how answers can be selected. You have several options to choose from. With Radio Button and Drop Down only one answer can be selected. Checkbox allows registrants to make multiple selections.
Add a Discount
1. Click Registration in the Side Navigation.
2. Click the Actions button, then select Discounts from the menu.
3. Click the Add Discount button.
4. Fill out the Code you want registrants to enter. They'll need to use this code to get the discount.
5. Enter either a percentage or fixed amount to be taken off the price.
For more information check out How to Create a Discount
Customize Your Registration
1. Click Styles in the Side Navigation.
2. Click Edit Styles.
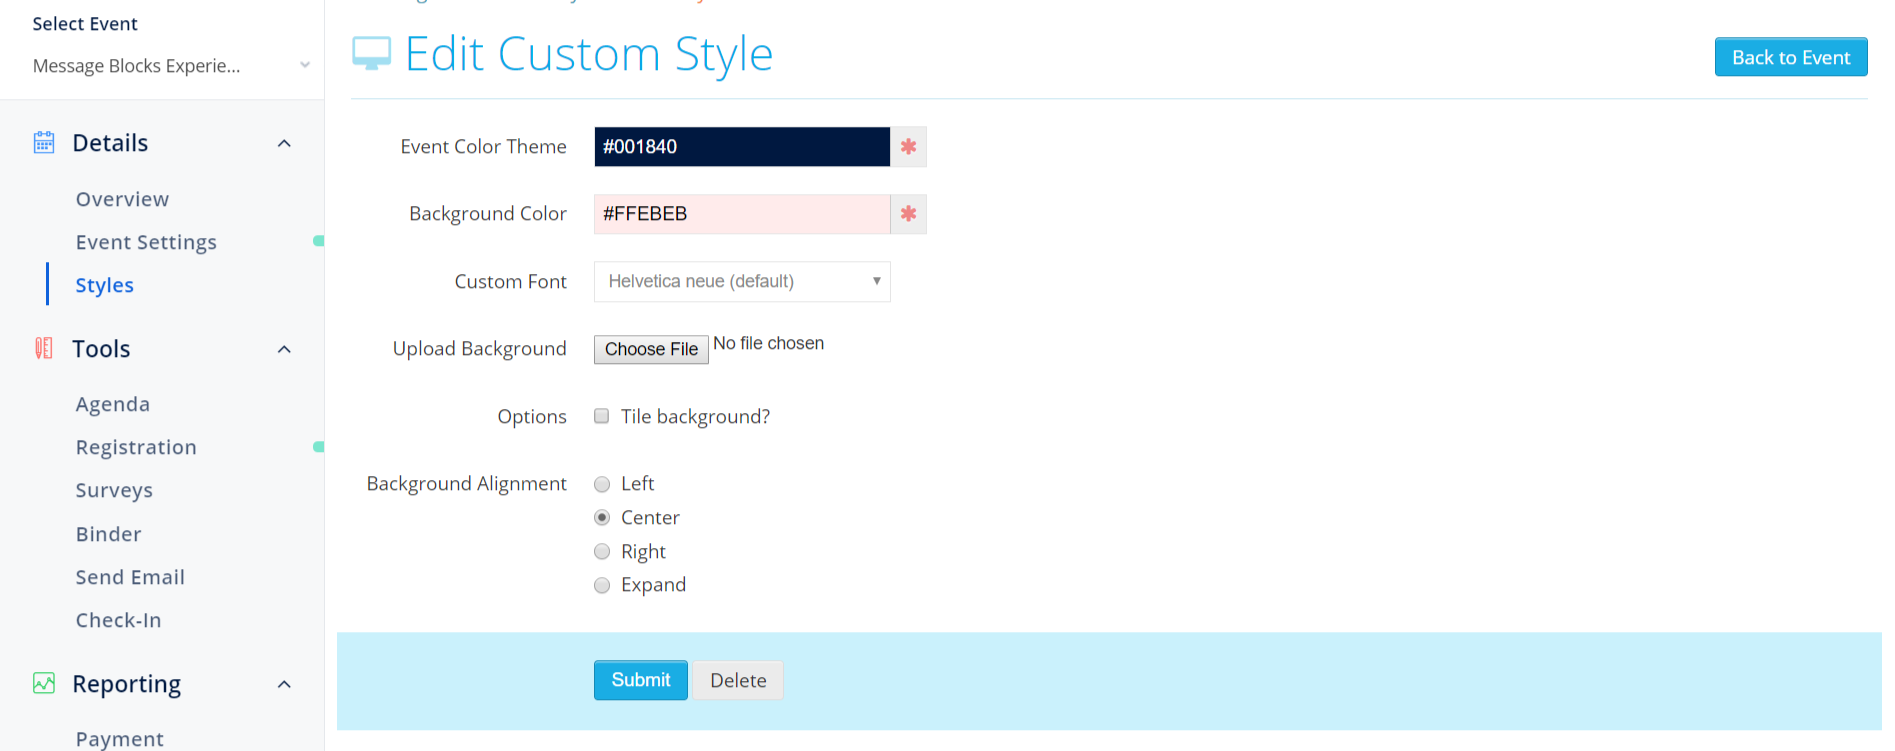
3. Select colors for your registration site's header and background in the Event Color Theme and Background Color inputs, respectively.

4. Click the Choose File button to upload a background image.
Open registration
1) Click Registration in the Side Navigation
2) Click the Registration Settings button.
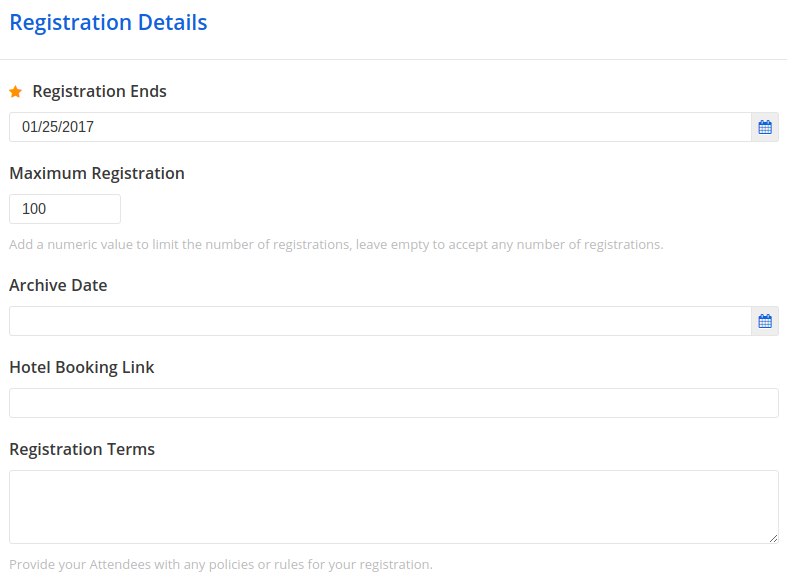
3) Fill out the content on the Registration Settings page, be sure to select an end date for your registration.

4) Click the Save button at the bottom of the page.
Note: Price Tiers with price-related fields can't be edited once you've started taking paid registrations, so make sure to review your price tiers before opening registration.
Did this answer your question?