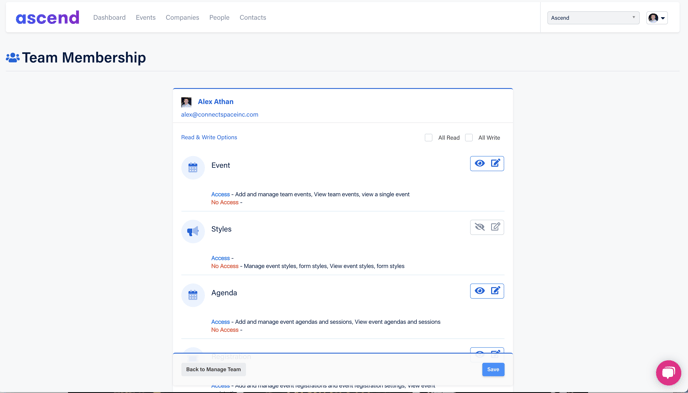
Learn how to edit permissions for your Team Members.
In Connect Space, you can set Read and/or Write permissions for every aspect of the application, so the right people can view and edit the right things. This article covers how to edit your team's permissions
Please note, Permissions are established on a Team-by-Team basis, so Team members can have different permissions on different teams. Additionally, roles within teams can be defined as teammate, for inside members, or as collaborator, for external members. For more information, click here to learn more about Event Permissions.
1) Click the down arrow next to the Profile Icon in the top right corner of the screen, and click Manage Team from the dropdown menu. If you have Team Management, permissions you’ll see 2 buttons on the right side of each Team Member: Manage Permissions and Delete.
2) Click the Manage Permissions button on the Team Member whose permissions you want to edit.
If you’d like to simply give the team member all Read and/or all Write permissions, check the appropriate box at the top of the permissions list.
3) When setting permissions, the Eye icon sets the Read (View) permissions, and the Pad and Pencil icon sets Write (Modify) permissions. If the icon is blue, that means the team member has the permission enabled. If it’s red, the permission is disabled.
4) Click the Save button at the bottom to save the changes you’ve made to a team member’s permissions.
