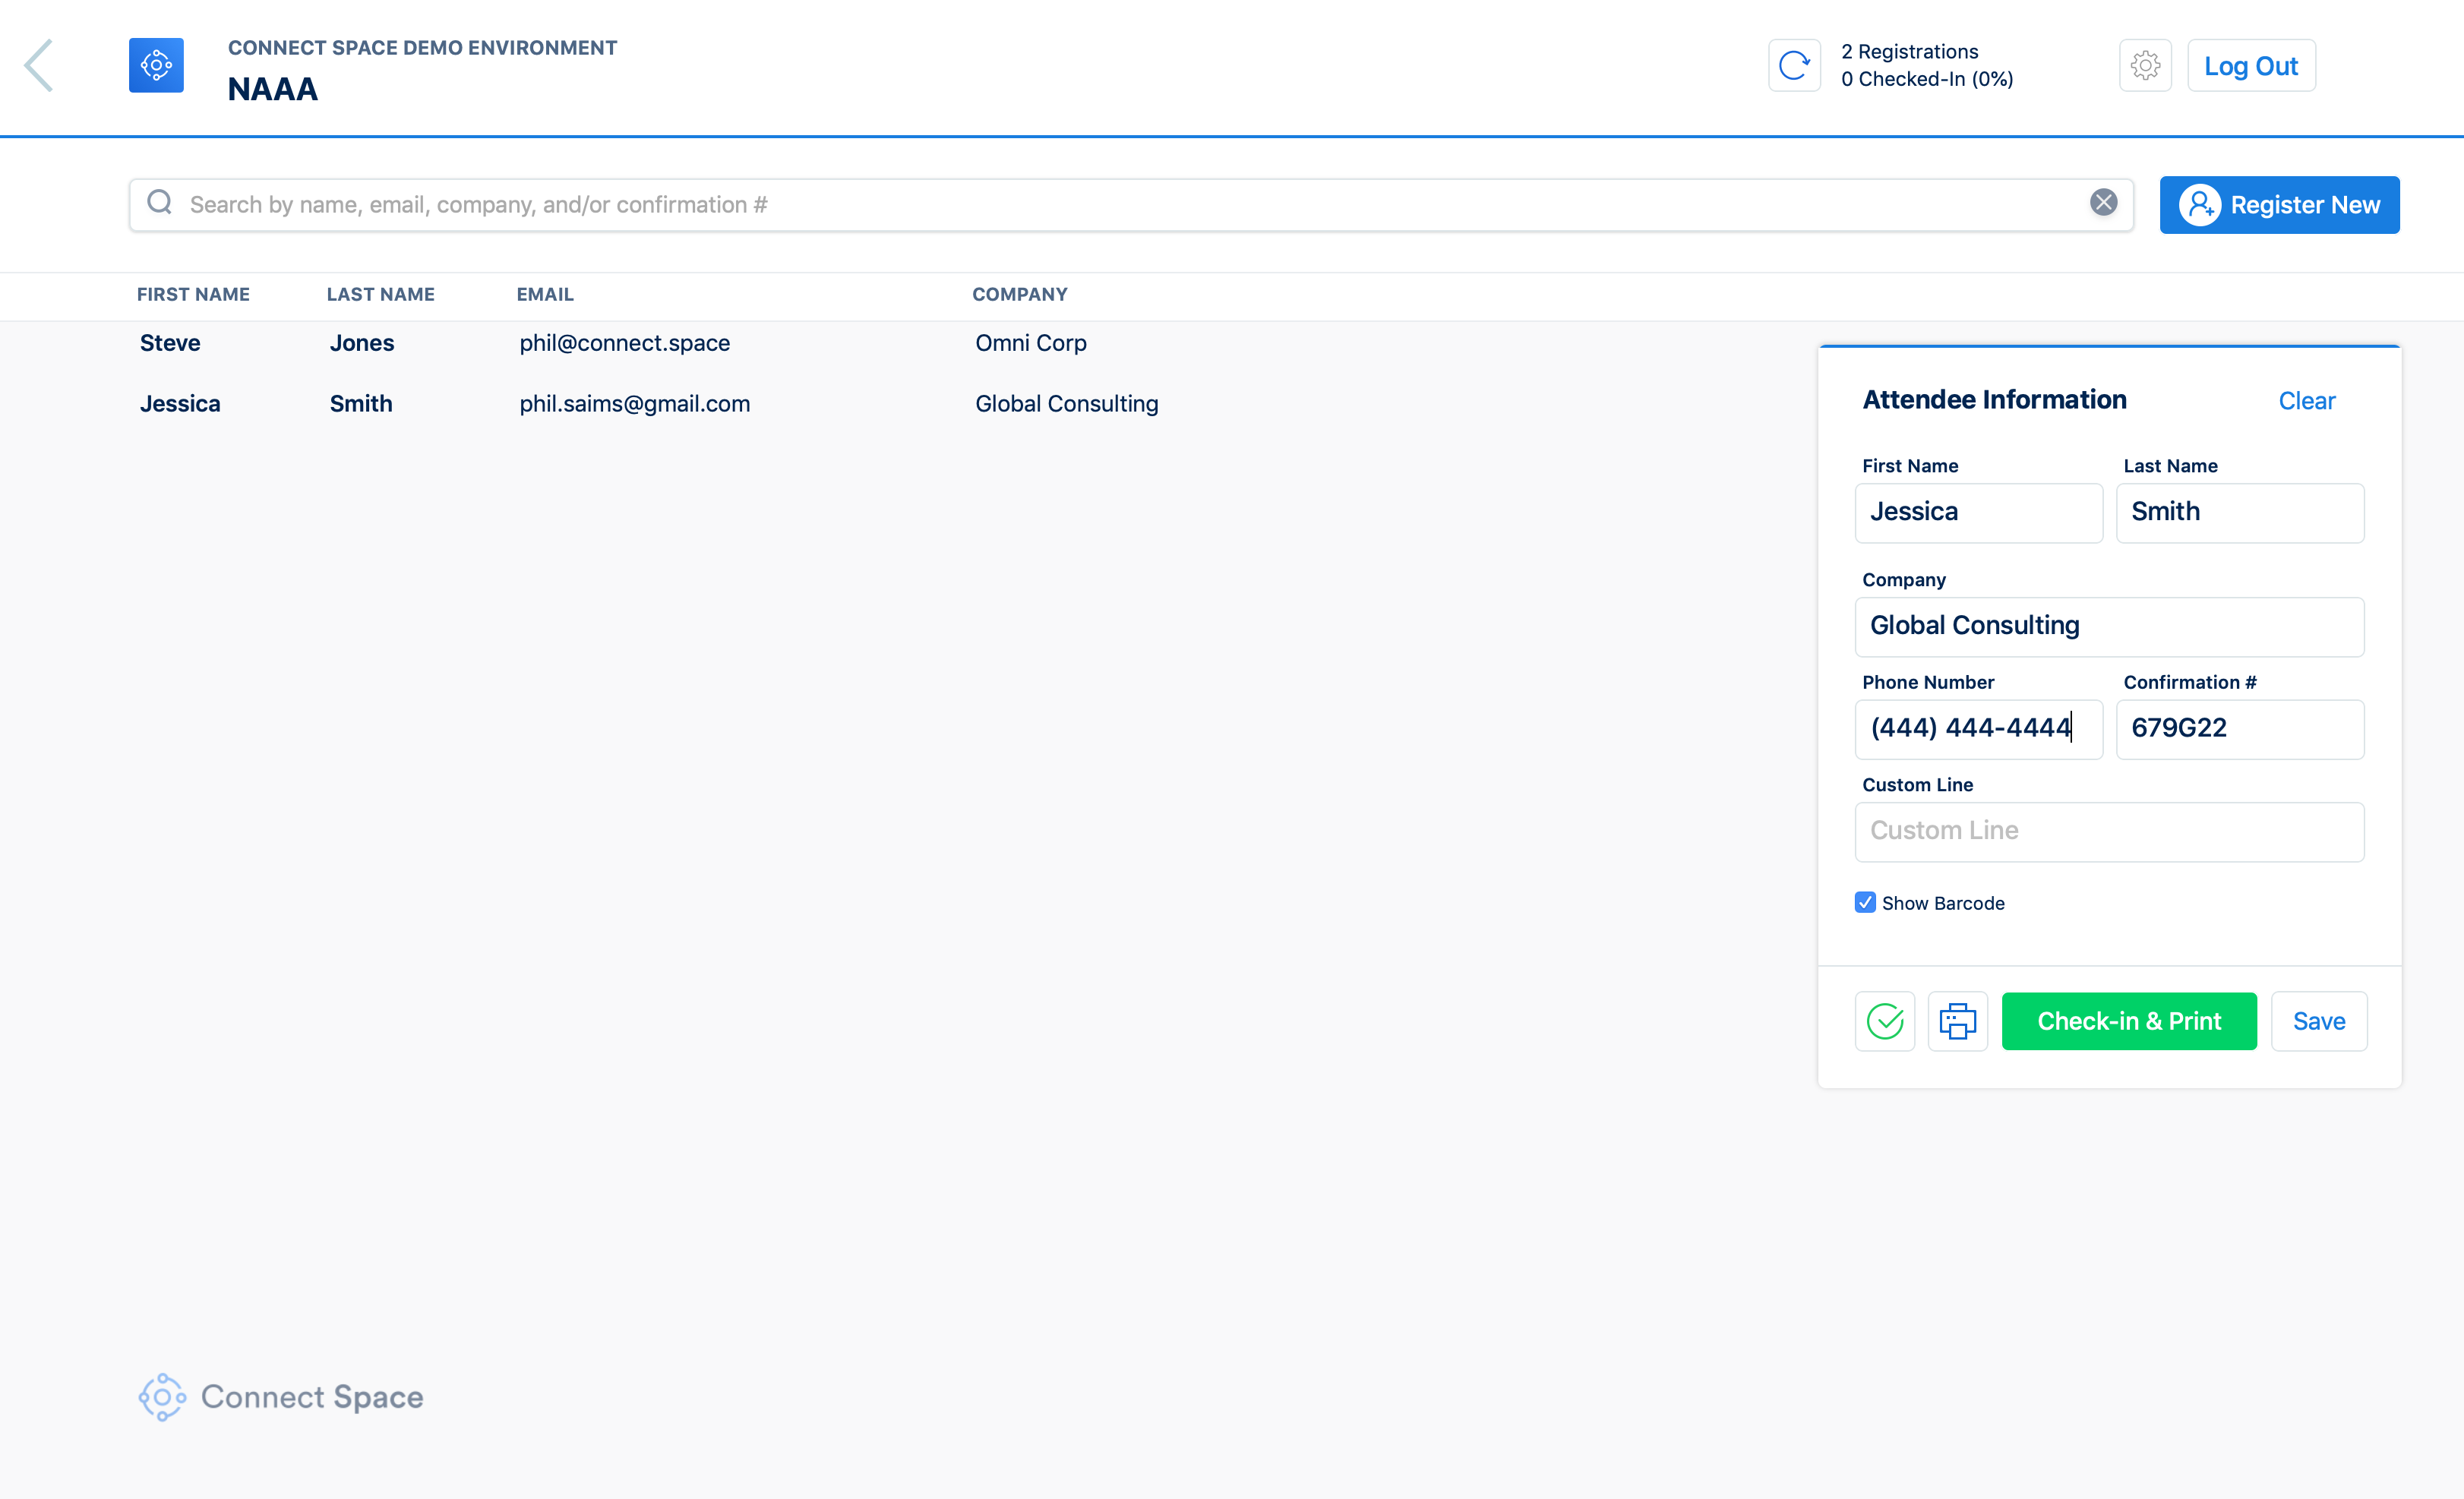
Check-in is one of the most important aspects of the day of your event. Avoid frustrating check-in that can start your event off on the wrong foot!
Getting Started
Go to the App Store (iOS) or Google Play (Android) to download the free Connect Space app.
Login
Open the App. You will be asked to sign-in using your planner credentials. Next, you will be prompted to select your team from a drop down menu. Select your team, and you will be prompted to select your event, again from a drop down menu. Select your event.
Checking In
Once you have selected your event, your screen will be populated by a list of your registered attendees.

- Using the Search bar, you can find attendees by first name, last name, company or email address. You may also search by registration confirmation number if that is available.
- Once found, click on the attendee. This will populate the attendee information on the right hand side of the screen. Additionally, you may edit the Attendee Information in the right hand box. To save any changes, click Save.
- To check the attendee in, click the green check mark button.
- To print a badge only, click the blue print button.
- To both check the attendee in and print a badge at the same time, click the green Check-in and Print button.
For more information about badge printing, click here
https://intercom.help/connect-space-inc/en/articles/3400651-cs-team-attendee-badge-printing
Did this answer your question?
