This article describes the use of the CS Team App for attendee badge printing.
While attendee check-in is one of the most important aspects of the day of your event, printing attendee name badges is arguably as important, if not more so. For an attendee interested in meeting other attendees and networking, a badge helps with those introductions! Our CS Team App helps make sure you provide the best badge printing experience possible to your attendees.
Getting Started
Contact Connect Space to have a copy of the CS Team App delivered to you. This is a Mac OS X application, so it will only work on Mac devices running macOS High Sierra (10.13.6) or newer. Once received, double click on the .DMG file to open the installation folder and then drag the CS Team App into your Applications folder.
Login
Open the App. You will be asked to sign-in using your planner credentials. Next, you will be prompted to select your team from a drop down menu. Select your team, and you will be prompted to select your event, again from a drop down menu. Select your event.
Creating your Badge Printing Settings
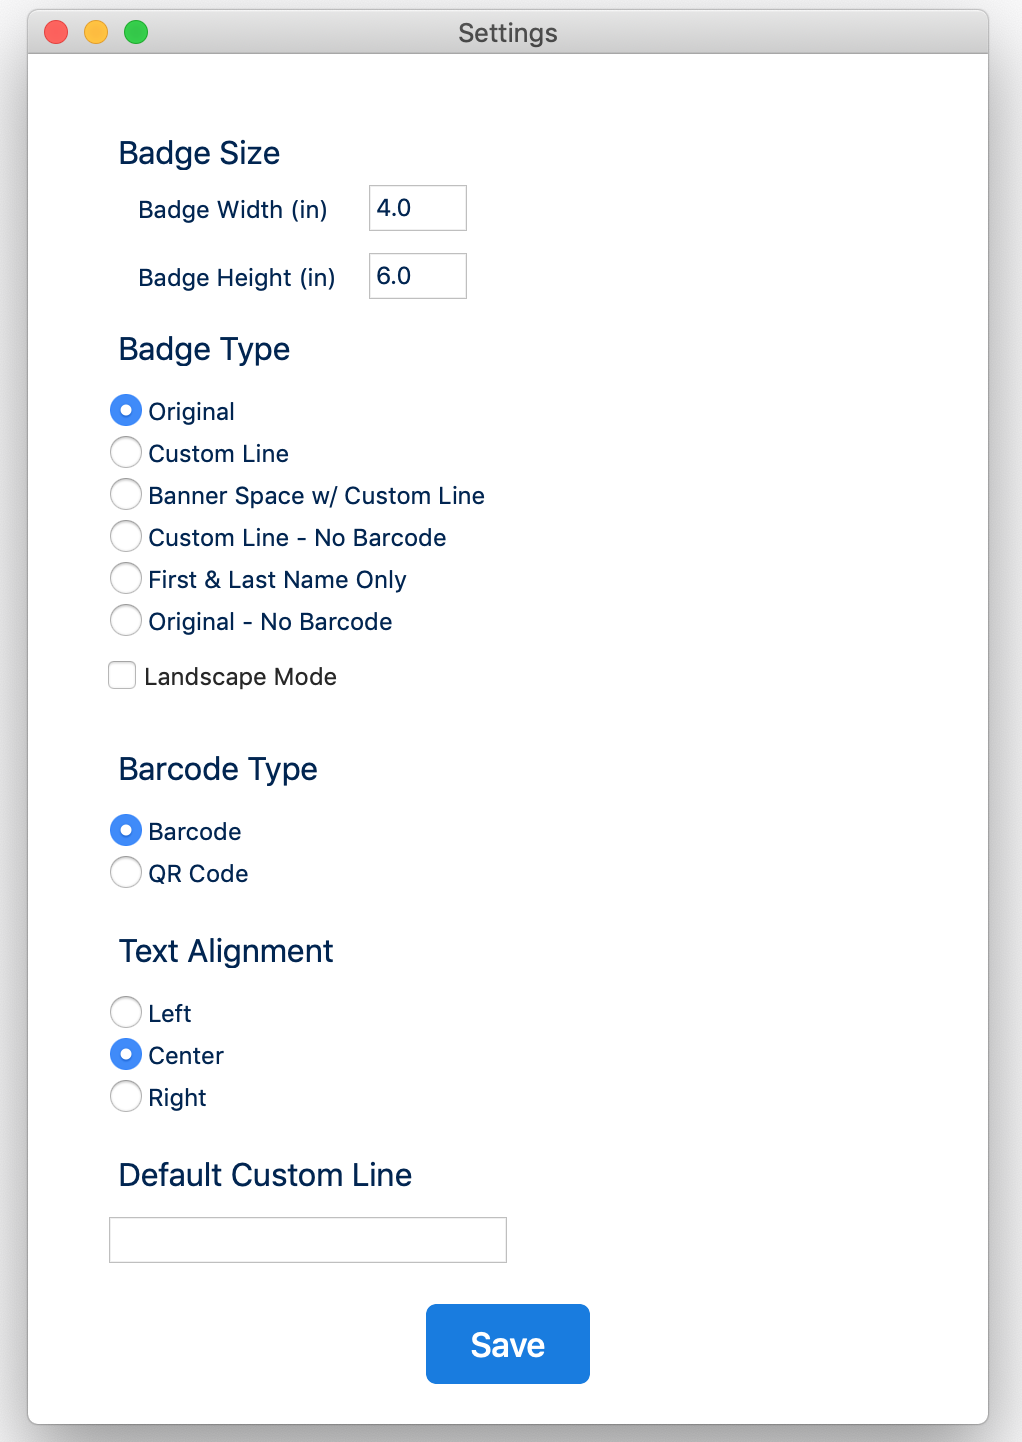
Once you have selected your event, your screen will be populated by a list of your registered attendees. Before printing your first badge, make sure that your badge printing settings are up to date! To open settings, click the gear button in the upper right corner of the screen. The following screen will display:

- Edit the Badge Size height field as appropriate (typically 3in or 6in).
- Edit the Badge Type (typically Original).
- Edit the Barcode Type (choose Barcode, QR Code is unavailable at this time).
- Edit the Text Alignment (typically center).
- Click Save to save any changes.
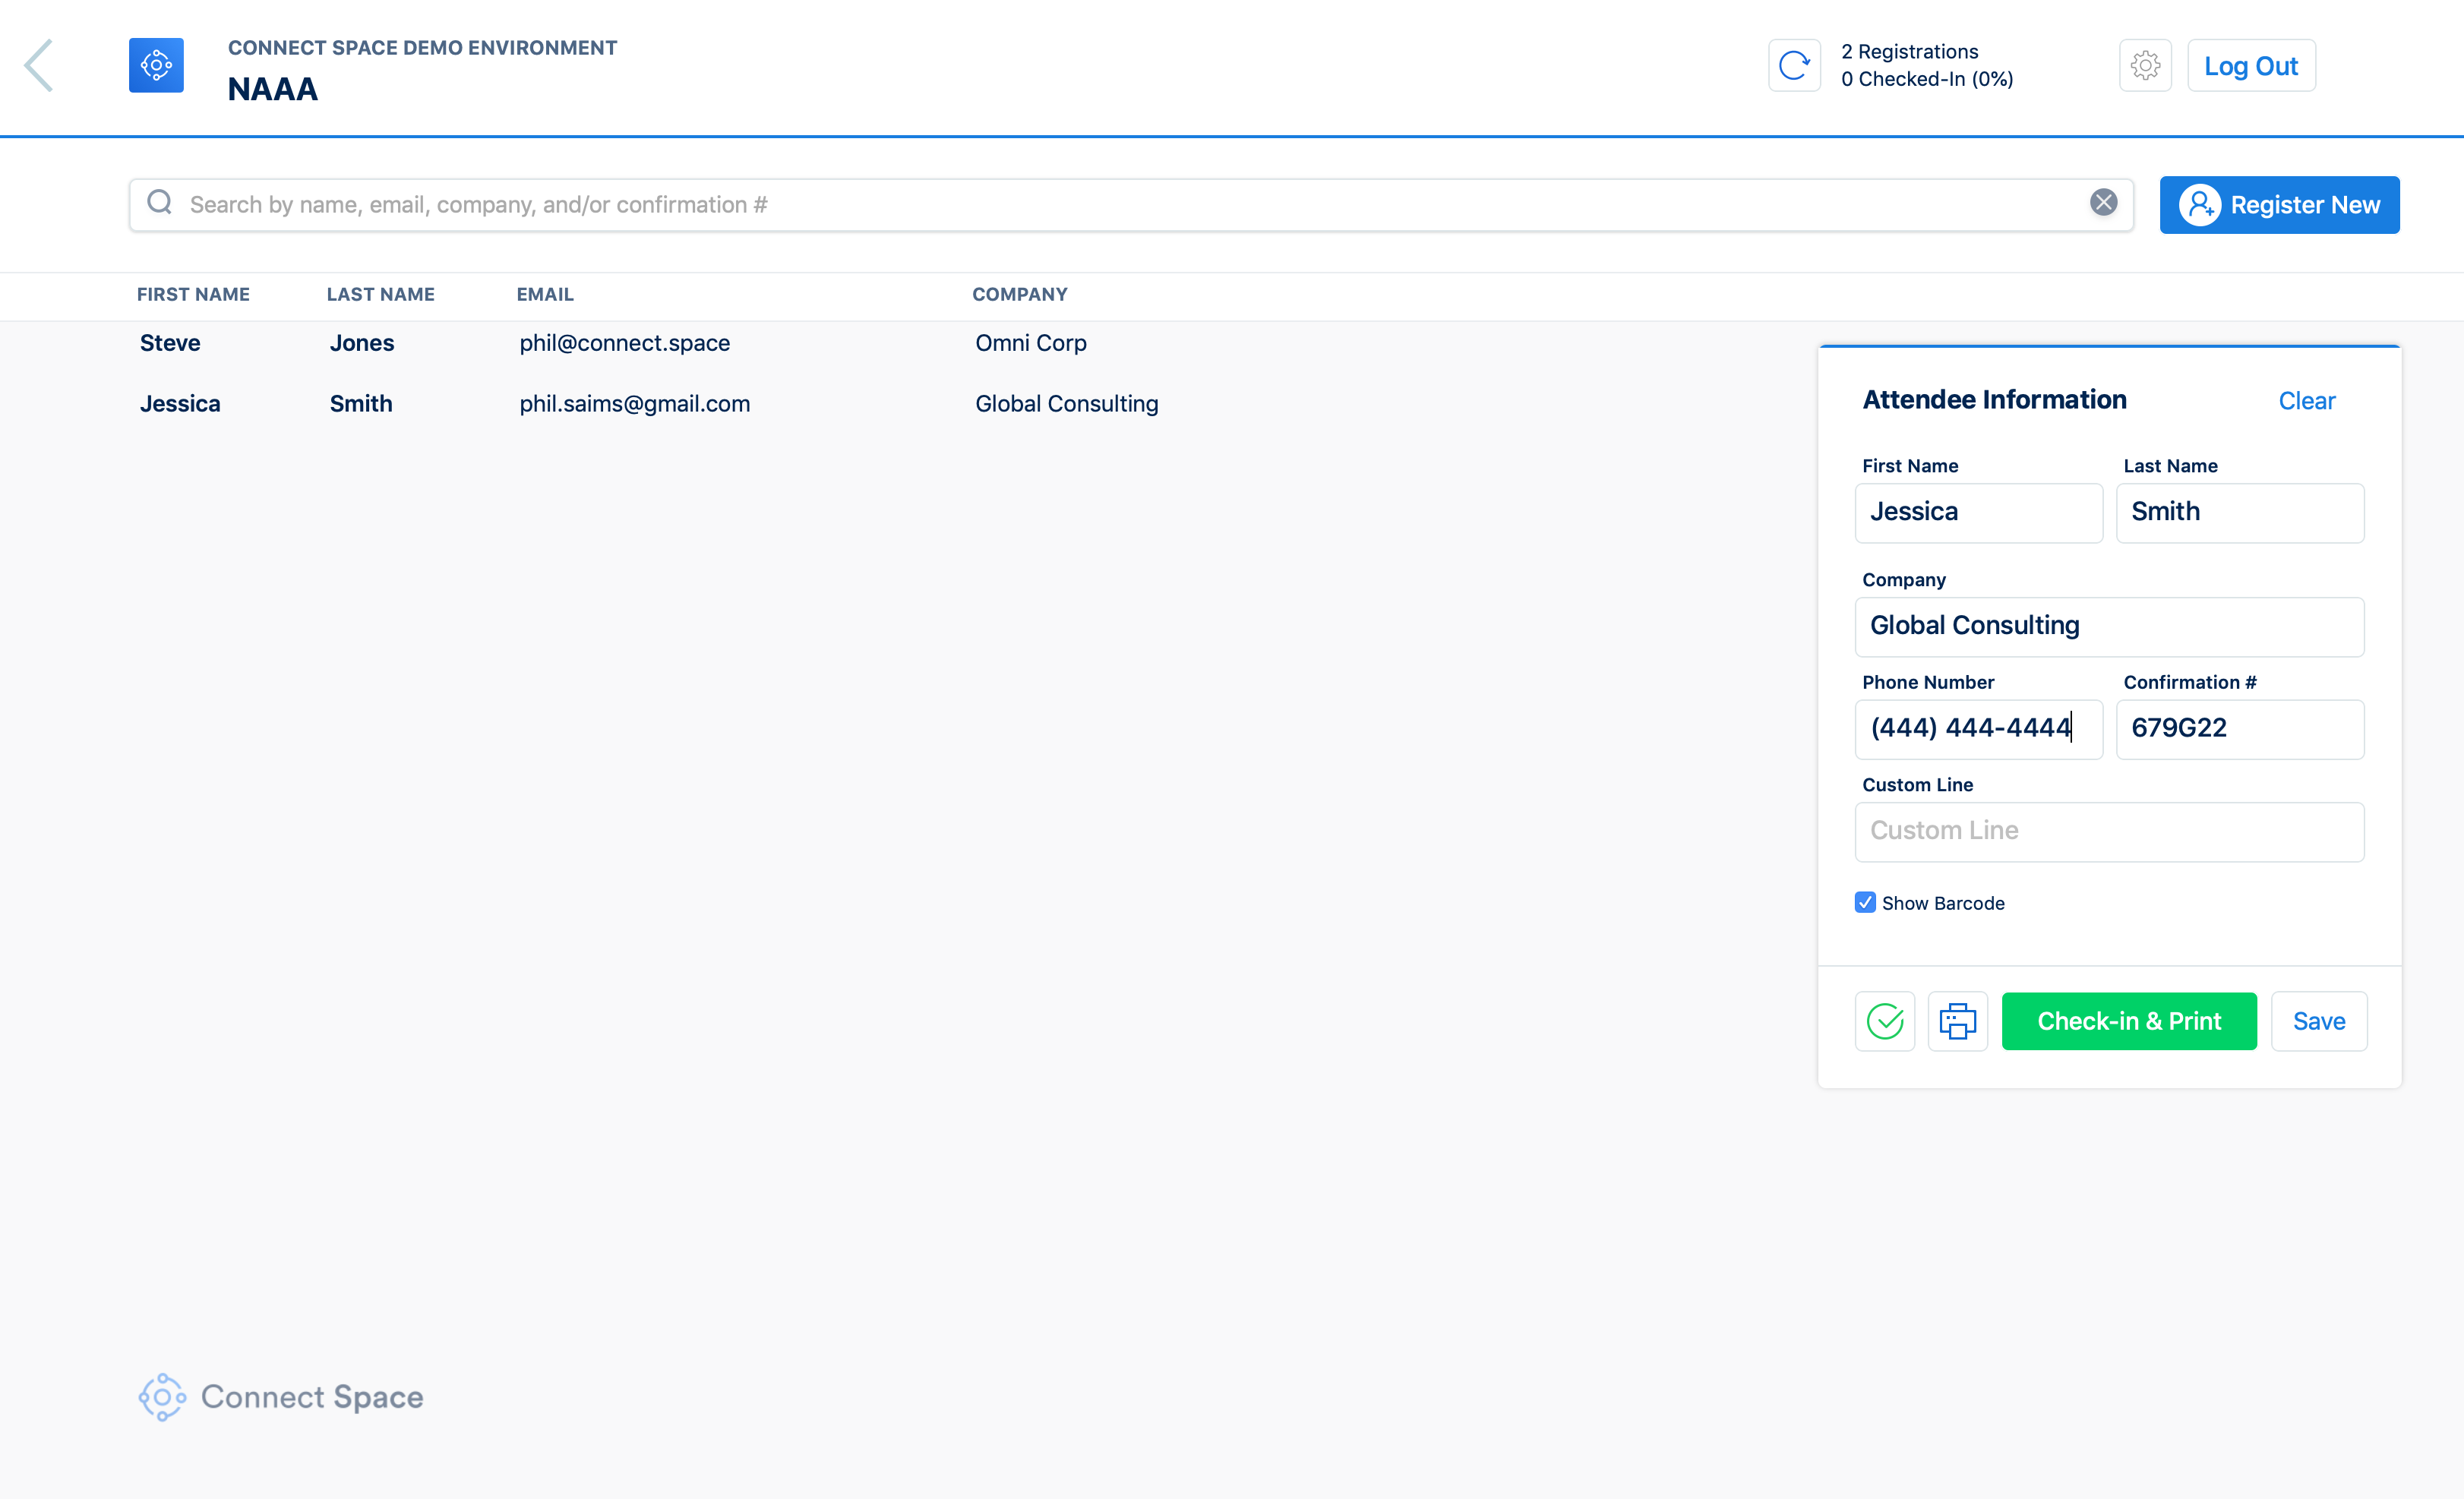
Now that the badge settings are complete, you can add your badge printer to your device. Click on the printer icon near the bottom of the Attendee Information box:

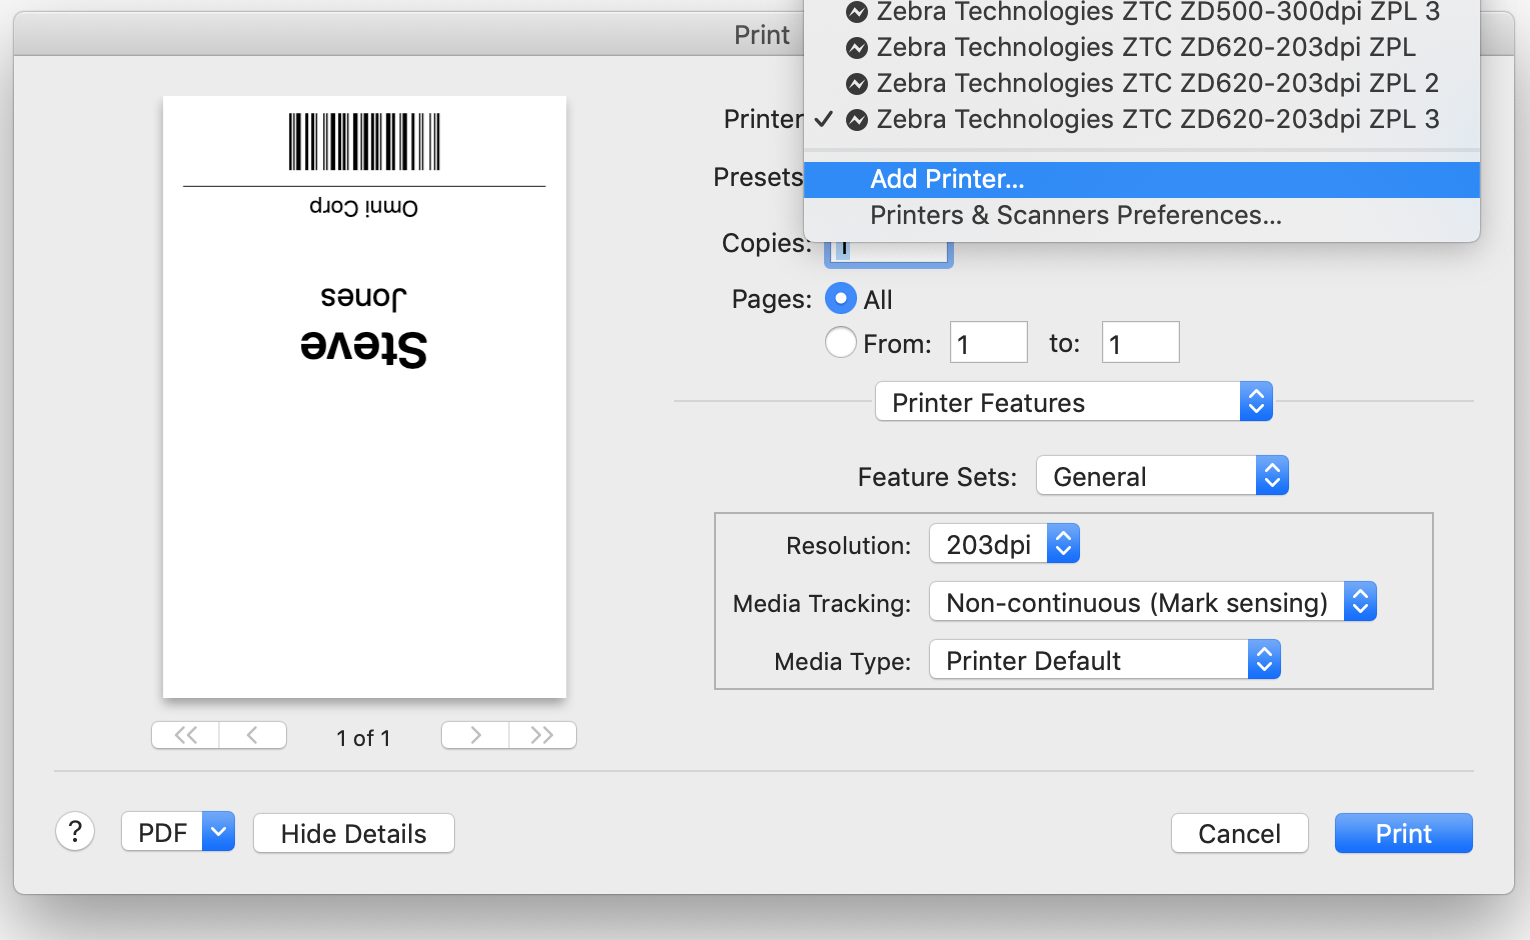
This will bring up your print dialog box. Make sure to select Show Details if it is not already expanded.
To add your badge printer, click on the printer drop down menu and select Add Printer.

- Select your Zebra printer from the list of printers
- Click the Use dropdown.
- Click Select Software and choose the last entry Zebra ZPL Label Printer.
- Click OK.
- Click Add.
Setting up your Zebra Printer to be print badges
Follow these instructions every time you change badge stock of different type (Mark vs. Gap/Notch) or size (4" x 3" vs. 4" x 6").
Configure the Printer Settings on your Zebra Printer
- Click Home button on the Zebra printer.
- Select the Settings menu (top left) and click the Select Button (checkmark) on the printer
- Click the right arrow twice to reach Media Type and click the up/down arrows to select Gap/Notch if your badge stock has a notch separating the badges in the roll OR select Mark if your badge stock has a black line on the back separating the badge stock.
Changing the badge tear off position
To allow for an easier time tearing off the badges, we recommend the following settings:
- Click the Home button on the Zebra printer.
- Select the Settings menu (top left) and click the Select Button (checkmark) on the printer
- Click the right/left arrow until you reach Tear Off and using the up/down arrows, adjust this number to 43, or your personal preference.
Calibrating the Printer
- Click the Home button again and this time go to the Tools menu (2nd from the top left).
- Click the right arrow twice to reach Head Close Action and click the up/down arrow until you reach Calibrate.
- Open the printer, insert the roll of badges if they are not already inside, and close it again. Click the Pause button to unpause the printer and trigger the calibration.
- Once the printer has been calibrated (normally processes 2 badges), return to the Tools menu and change the Head Close Action option back to No Motion so you do not waste badges every time you open the printer.
Configure the Printer Settings on your Mac
Once your Zebra printer has been added, or selected, make sure it is setup to match the style of Zebra Thermal Badges you have purchased. Badges will be available in either BLACK MARK (also known as Mark Sensing) or GAP/NOTCH (also known as Web Sensing). To verify/edit your badge stock:
- Click Printer Features in the dropdown toward the middle of the dialog box.
- In Media Tracking, select Non-Continuous (Web Sensing) if your badge stock has a notch separating the badges in the roll. Select Non-Continuous (Mark Sensing) if your badge stock has a black line on the back separating the badge stock.
- IMPORTANT: You can save these settings for future use by clicking the Presets dropdown near the top of the dialog box, and selecting Save Current Settings as Preset. Name the Preset and click OK.
Click Print!
Did this answer your question?
