Want to get data on who actually attended your event? Use the Connect Space mobile app to quickly check in attendees!
Check-In is one of the most important aspects of the day of your event. Having a frustrating check-in process can put your attendees into a bad mood before the event gets started! Our Connect Space mobile app helps you make sure to provide the best experience possible to your attendees.
In this article we're going to cover event check-in both with and without a mobile scanner. It assumes you're familiar with the basics of the Connect Space mobile app, if not head over to the basics of Connect Space Mobile before continuing.
Mobile Check-In Without a Mobile Scanner
1) Click the Check-In Icon in the bottom navigation.
2) In the Active Events list, click on the event you’d like to start checking in for.
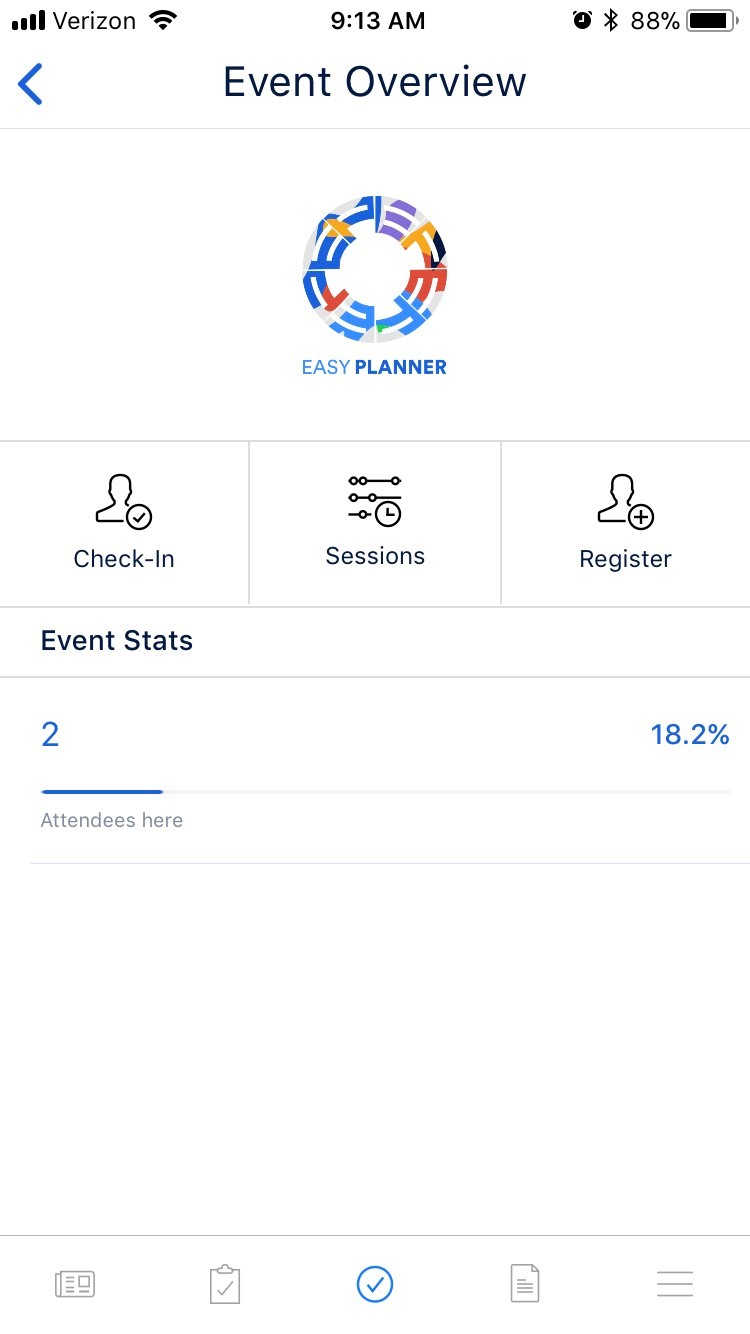
3) Clicking on an event takes you to the Event Overview screen. Click Check-In to begin checking in Attendees.
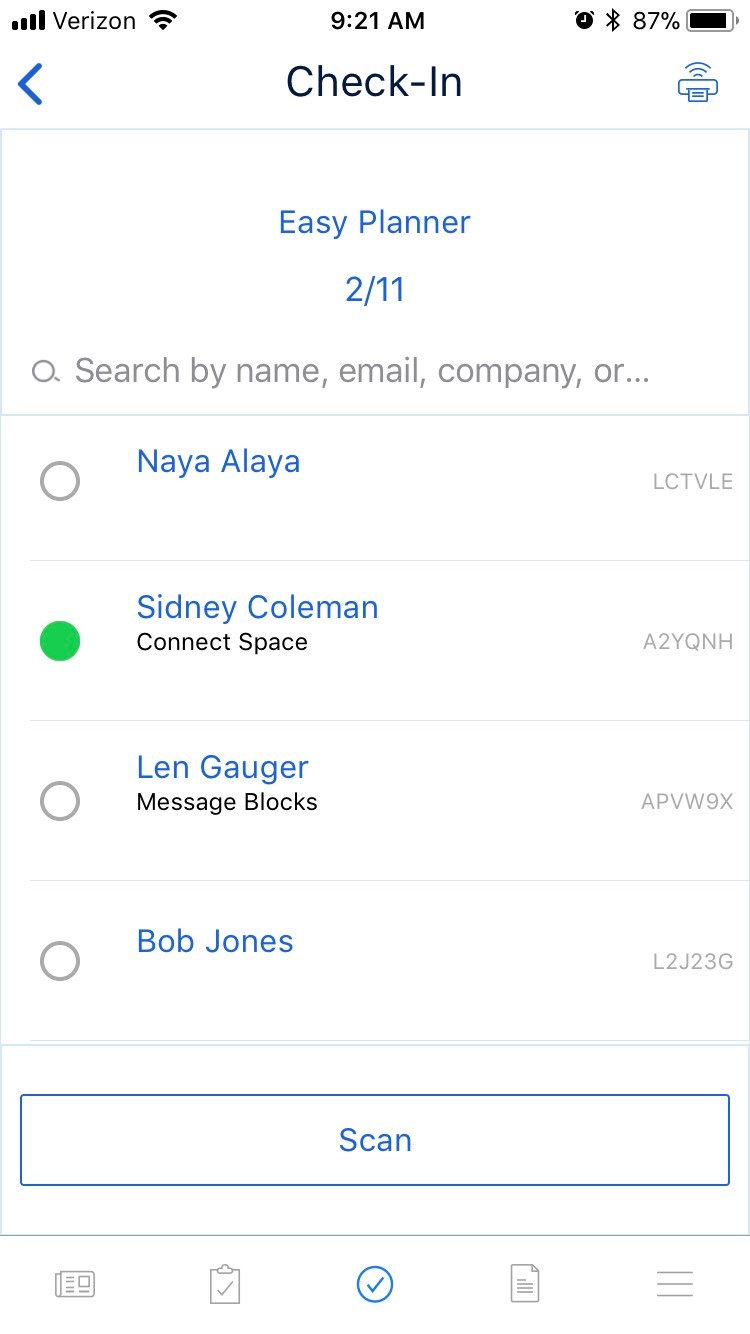
4) To check in an Attendee, click on their name. Names with a green dot next to them have been successfully checked in.
5) Click the Check In button to check in the Attendee.
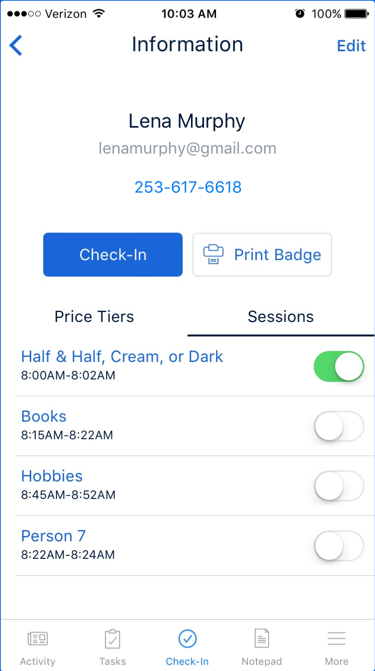
After successfully checking in the Attendee, the Check In button will turn into a Checkout button.
When you return to the Check-In Screen, you’ll see that the circle next to the contact’s name is now green.
Mobile Check-In With a Mobile Scanner
Our mobile scanning feature turns your phone into a scanner gun!
1) Navigate to the Check-In Screen like you did in the previous section.
2) Click the Scan button.
3) Focus your camera on the Attendee’s receipt to check them in. This will bring up the Attendee’s Information screen.
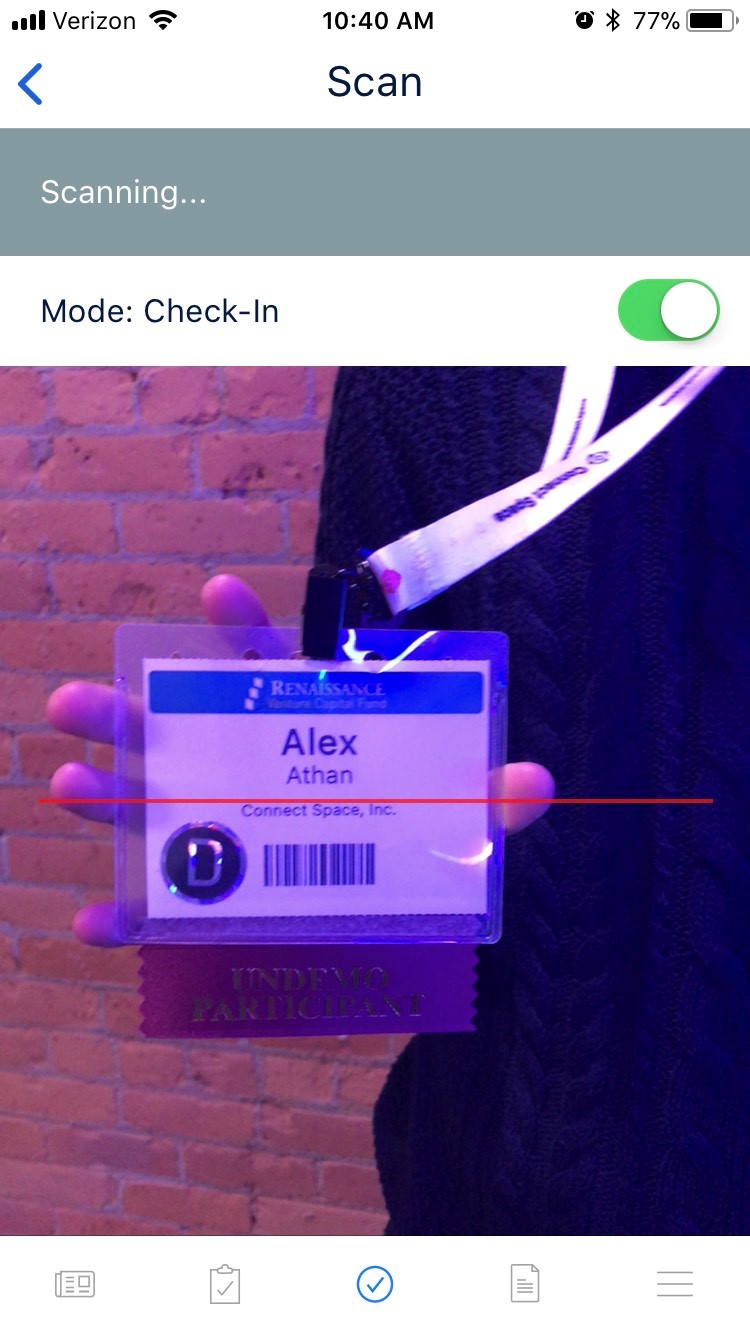
5) Tap Check In to complete the check in.
Note: You must give the app permission to use your camera in order to use your phone for scanning.
6) If you want to check in a lot of Attendees in quick succession, tap the Rapid Scan Toggle at the top-left of the screen. Clicking this will instantly check in the Attendee without bringing you to the Attendee Information screen first.
Did this answer your question?