Learn how to curate which matches your buyers see when choosing who to meet with.
As a Facilitator, the Pre-Scheduling step enables you to curate the matchmaking experience for your Buyers. You can add, reorder, or remove submissions for your Buyers by searching submissions based on filters to find companies that matched Tags with your Buyers.
However, you aren’t required to do anything in this pre-scheduling step. You could simply pass along the list of Suppliers straight to the Buyer for ranking.
- Click Meetings in the Side-level Navigation.
- Click Preferences.
- Search for and Click the company you are interested in.
- Click Create Schedule from Selection.
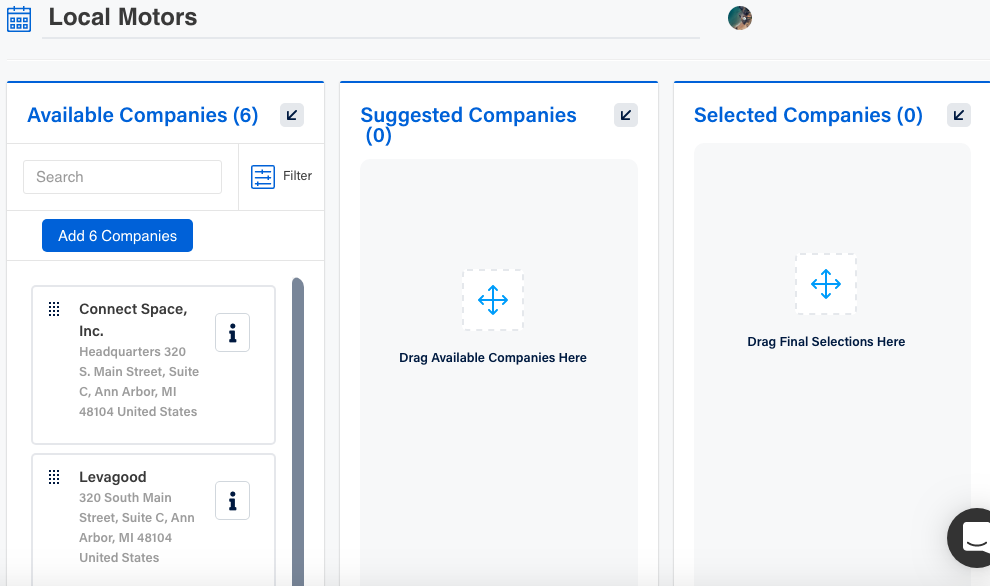
- The Meeting Schedule screen has three columns: Available companies, Suggested Companies, and Selected Companies.
- The Available Companies column will be active companies that have filled out a form for the Event. As new companies are created, you as the facilitator will have to accept them first in order to see them show up in the available area.
- The Suggested Companies column will contain those companies that have submitted forms that contain tags that match tags submitted on your Buyer forms.
- The Selected Companies column will be those companies selected by the Facilitator for meetings. Click-and-Drag companies from the Suggested column into the Selected column to add them to the Buyers schedule. Note: the order in which the Selected Companies appear indicate a preference from the Buyer for a meeting, i.e. the top company in the column is considered more of a priority to obtain a meeting than the last company in the column. Companies can be reordered by dragging them up or down the Selected column.

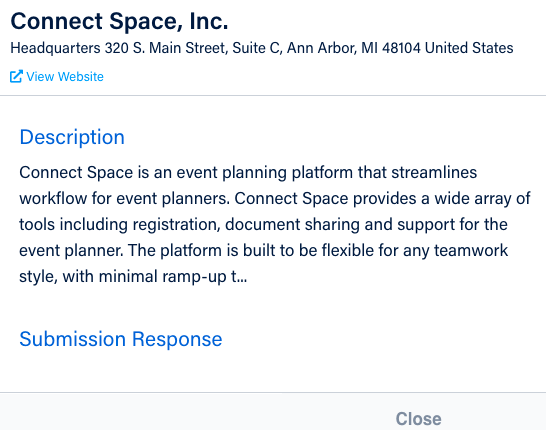
If you want to see more information about a company, click the "i" icon. The image below shows the modal that appears on the screen when you do this:

Click the Save button at the bottom of the screen to save these selections. If you want to send this schedule to the company so they can rank it, click the Send Now button.
If you have confirmed the Buyer's schedule with them via phone or email, you do not need to send them their ranked preferences online. Instead, you can lock in their preferences by selecting Set Preferences.

How to Access Preferences Share Link
You can create a general link that will take Buyers directly to setting their preferences.
- Click Meetings in the side navagation.
- Click Preferences.
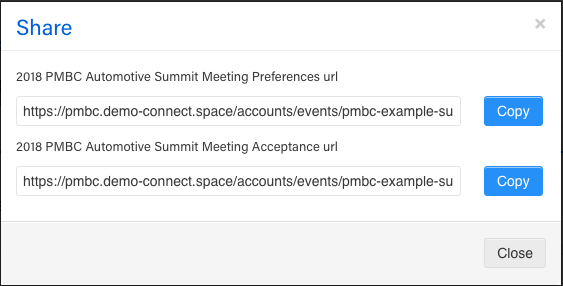
- Click the Share button.
- Click the Copy button, which when pasted into an email, will provide the meetings preferences url in a link. Once your Buyer clicks on this link, they can navigate directly to preferences.

How to use Filters When Pre-Scheduling
Filters can help speed up your process when searching through companies for potential matches. You can select the exact criteria the Buyer is looking for to quickly add the right companies.
- Click Meetings in the Side-level Navigation.
- Click Preferences
- Search for and Click the Buyer Company in question.
- Click Create Schedule from Selection.
- In the Available Companies column, you will see the Filter icon. Click, and you have the option of filtering the available companies by (can filter by more than one):
Forms - Show only submissions of a certain Form, or drill down further to specific form questions.
Tags - Only show companies that submitted a specific tag(s).
Qualifications - Only show companies that submitted a certain qualification.
Address - Filter by city, state, country and/or zip code.

6. Click the Apply Filters button to view those companies that match your criteria. If you want to add ALL the companies that match the chosen filter criteria, click the Add Companies icon just below the Filters tab.
Did this answer your question?