How to Add Your First Exhibitor
Getting started is easy. From your left navagation, select Event Builder and then select Expo. Click the Add Exhibitor button. This will open a simple form to fill out.
1. Basic Information 🏢
This is the essential information that attendees will see first.
-
Company Name (Required): The official name of the exhibiting organization.
- Point of Contact: enter the email address of the exhibitor representative.
-
Booth Location: Their location/number, whether it's a physical spot (
Booth 215) or a virtual one (Virtual Booth 5). - Description: a detailed description of your exhibitor.

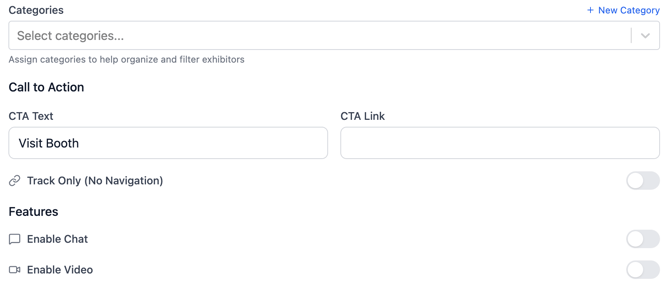
- Category: optional, but you can assign categories for organizational purposes.
- Call to Action Button (CTA): Entirely customizable, you can choose any CTA you like and provide a link to that CTA.
- Toggle Options: You can enable Track Only, Enable Chat, or Enable Video if any of these apply.
2. Visibility and Social Media
- You have the option of publishing this Exhibitor on the web and/or on the mobile app.
- Enter Exhibitor's Social Media URLs to promote their pages directly from their booth

3. Imaging
-
Logo: Upload the company's logo. For the best results, use a square (
1:1ratio), high-quality image (300x300pxor larger) on a transparent background. - Banner (optional): upload a banner image for the Exhibitor, ideally 1200x400px(3:1)or 800x400px(2:1).
- Click Save Exhibitor to save your information.

Organizing Your Expo
Once you've added some exhibitors, it's time to get organized.
-
Create Categories: Group exhibitors into logical categories like "Technology," "Healthcare," or "Sponsorship Level." This makes it incredibly easy for attendees to filter the directory and find what they're looking for.
-
Customize the Display Order: Simply click and hold the
⋮⋮drag handle on any exhibitor card to change its position based on web vs. mobile app. You can use this to place premium sponsors at the top or to group exhibitors alphabetically. -
Search and Filter: Use the search bar and filter options at the top of the page to quickly find specific exhibitors or view a single category at a time.
Tips for a Successful Expo
-
Gather Info Early: Send your exhibitors a simple form to collect their logo, description, and links well before your deadline. This saves you from chasing down information at the last minute.
-
Quality Check Everything: Before you go live, take a moment to click through your exhibitor profiles. Do all the links work? Do the logos look crisp and clear? Is the formatting consistent?
-
Think Like an Attendee: Are your categories clear and logical? Is it easy to understand where to find each exhibitor? A little planning goes a long way.
Planning for Virtual & Hybrid Events
Engage your audience no matter where they are.
-
Enable Virtual Engagement: Turn on the Allow Chat and Allow Video Calls toggles for your virtual exhibitors so they can connect directly with attendees.
-
Use a Clear Naming System: For virtual-only booths, use a logical "booth number" system like
Virtual Booth 1,Virtual Booth 2, etc., to keep things organized. -
List "Live" Hours: In the exhibitor's description, encourage them to list the specific hours their reps will be available for live chat or video calls, especially if you have a global audience.
Troubleshooting & FAQs
Why does an exhibitor's logo look blurry or stretched? This usually happens when the uploaded image is too small or not square. For best results, ask for a high-resolution logo that is at least 300x300px in a 1:1 (square) aspect ratio.